iPad - Back To Basics

We want to thank you for attending iPad - Back to Basics. Our hope is that this online outline helps reinforce what you learned. We have included videos and links to various things we think you may find helpful. If you have any further questions don't hestiate to contact us.
This outline is intended only for people who have paid for and attended iPad - Back to Basics. Please do not share it with others. We have spent numerous hours putting it together. If you know someone who can't attend class, but would benefit from this outline they can contact us and purchase it.
Major Sections
Click or tap on the section you want to go to and it will take you directly there.

Apple has released multiple different versions of the iPad. Here's a timeline:
- Spring 2010 - Original iPad
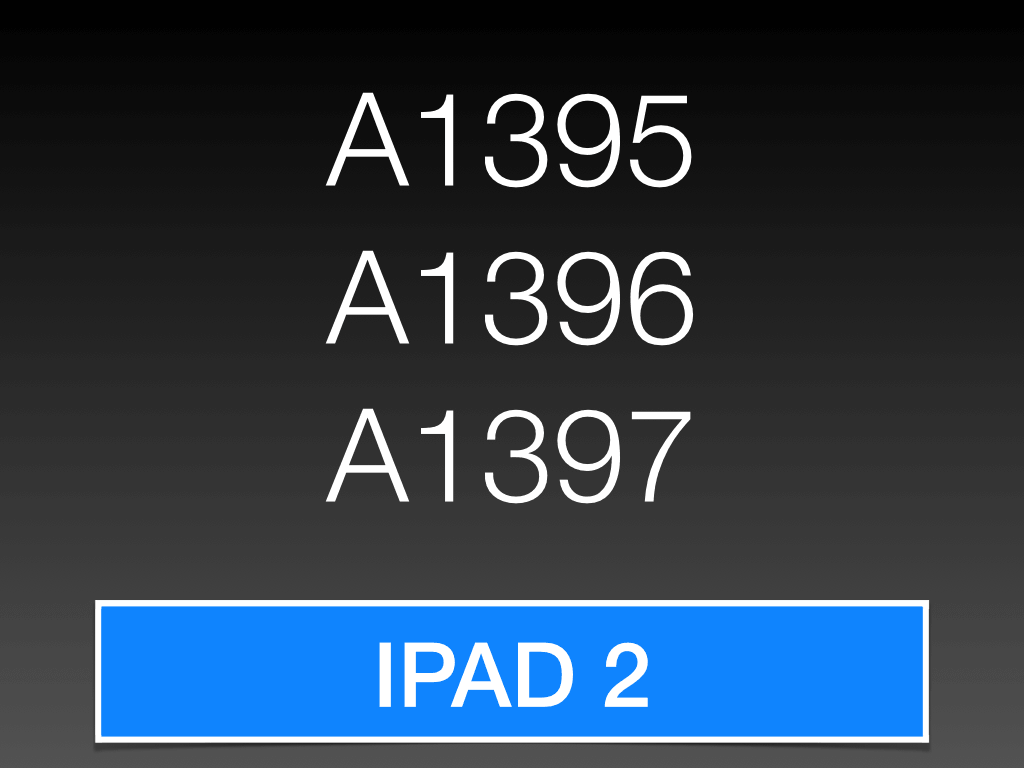
- Spring 2011 - iPad 2
- Spring 2012 - iPad 3
- Fall 2012 - iPad 4
- Fall 2012 - iPad mini
- Fall 2013 - iPad Air
- Fall 2013 - iPad mini with Retina
To determine which iPad model you have you will need to tap on:
Settings > General > About > Legal > Regulatory
You will need to look for the Model number at the top of Regulatory screen. Example: A1458


Minor Sections
Click or tap on the section you want to go to and it will take you directly there.
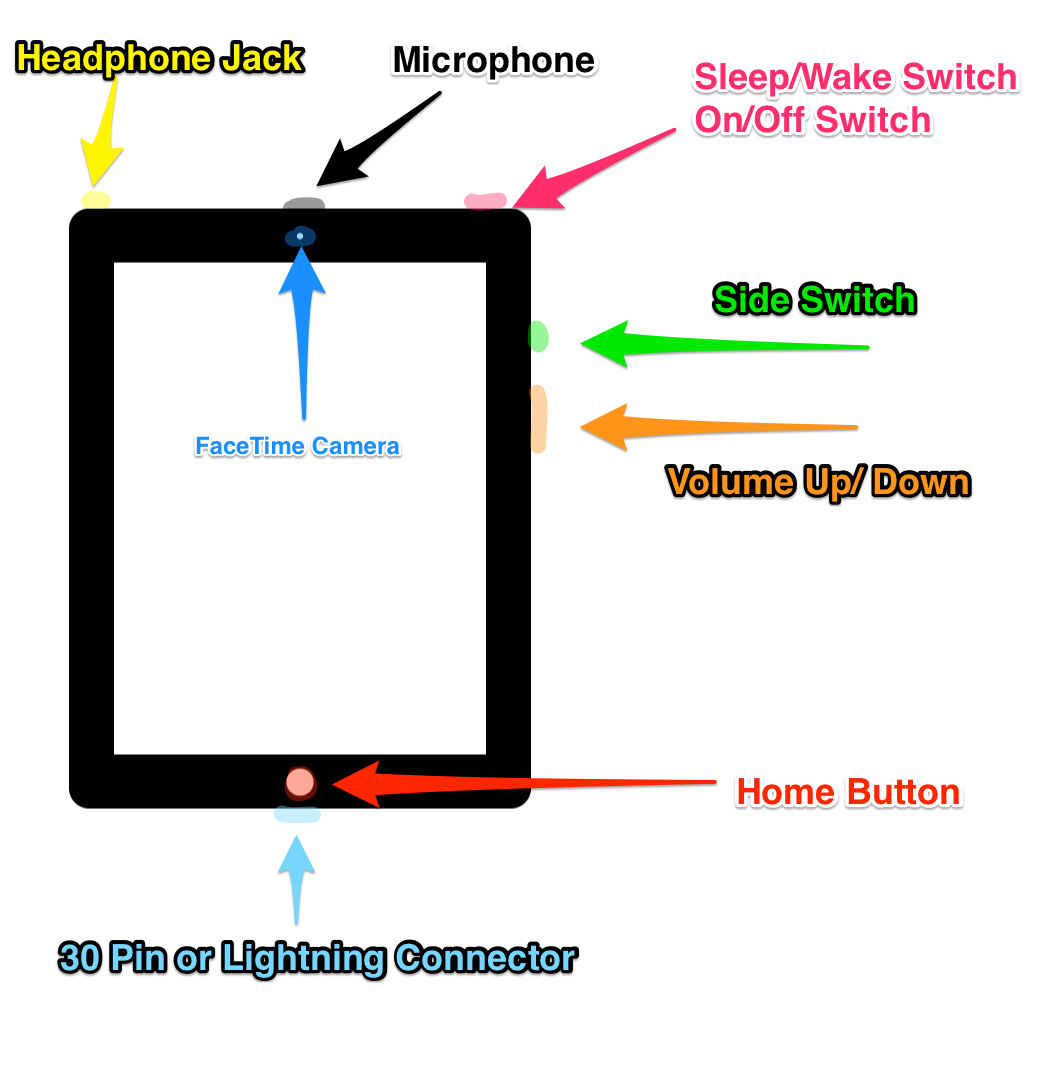
- Headphone Jack (top)
- Microphone (top)
- On/Off a.k.a. Sleep/Wake switch (top)
- Home Button (front bottom)
- Multi-touch Display
- FaceTime Camera (front top - NOT ON ORIGINAL IPAD)
- 30 pin dock connector (bottom - Original iPad, iPad 2, iPad 3)
- Lightning connector (bottom - iPad 4, iPad mini, iPad Air)
- Speaker (bottom)
- iSight Camera (back)
- Volume up/down (right side)
- Silent/Screen Rotation Lock switch (right side)

The Headphone Jack allows you to plug in a set of speakers or a pair of earbuds/headphones into your iPad. You do not need to use Apple branded speakers or earbuds/headphones.
Here are a couple scenarios where you might want to use a pair of earbuds/headphones:
- Watching a movie on an airplane
- Listening to an audiobook while someone else is in the room reading
- Enjoying music on the bus

The Microphone is active while using FaceTime, Skype, Siri or the Camera app (recording videos). You can also download apps to record voice memos.
“Don’t cover the microphone with your hand while recording a video or using an app that requires the microphone.”

The On/Off switch is found along the top of the iPad and is also called the Sleep/Wake Switch. We rarely turn the iPad off. We just let it go to sleep when it is not being used.
If your iPad is acting goofy, we recommend that you turn the iPad off and turn it back on. This can clear up many of the random issues that might come up with an iPad (once again, we rarely ever have to turn our iPads off).

The Home Button has various functions. The Home Button is not the "undo" button.
Single click Home Button
- If your iPad is sleeping and you click the Home Button it will wake up and ask you to slide to unlock.
- If you're in an app like Safari, Mail, Angry Birds, etc. and you click the Home Button you'll return to the Home Screen with all your app icons.
- If you're on your second or third Home Screen and click the Home Button you'll return to your main (first) Home Screen.
- If you're using Search and click the Home Button you'll go back to the Home Screen you were previously on.
- If your iPad is sleeping but still playing music or media (Music app, Pandora app, iHeart Radio app) and you single click the Home Button the Audio controls will pop up on the lock screen so you can play, pause, skip, etc.
Double click Home Button
- If you're on the Home Screen or using an app and you double click the Home Button the Multitasking screen will be revealed so you can quickly switch between apps.
Press and Hold Home Button For Two Seconds
- If you press and hold the Home Button on an iPad 3, iPad 4, or iPad mini, Siri will pop up and you can ask questions and give commands with your voice. (Learn about Siri in iPad - Search, Share, Discover)

The Multi-Touch Display allows you to interact with your iPad with your fingers. There are various gestures that you can perform. I have listed some basic ones below.
TAP
Tapping on your iPad is like clicking your mouse on a computer. Tapping is the most common and basic gesture.
DOUBLE-TAP
Tap an object twice quicky to double-tap. Double-taps are primarily used for zooming in or out on a webpage, photo, or map.
SLIDE, SWIPE, & FLICK
Swiping is one of your primary navigational tools: You use a left or right swipe to move through app pages on your Home screen or images in the Photos app; you use an up or down swipe to read text in Safari, iBooks, Newsstand, or elsewhere. It’s one of the easiest gestures to learn. Some people will also refer to swiping as sliding.
A flick is just like a swipe, only faster. The faster or slower you move your finger, the faster or slower content will move. If you want to get to the bottom of a page quickly, just flick your finger upward in a fast motion.
Note: All flicking and swiping on your device is inverse, meaning that when you move your finger up (in other words, swipe up), you’re actually moving whatever is on the screen downward. This is the opposite of how most people are use to using a mouse on a computer. Apple has changed scrolling on the Mac to match the iPad.

“This gesture allows you to save wear and tear on your home button while looking pretty cool!”

“No need to “close” apps on the iPad because your iPad does so for you after 10-15 minutes of no use.”

The FaceTime Camera can be used with FaceTime or Skype to video chat with others. The kids like to use the FaceTime Camera with Photo Booth to take goofy photos of themselves.
You will learn how to use FaceTime in iPad - Keeping In Touch.


30 Pin Connector can be found on the Original iPad, iPad 2, and iPad 3. The 30 Pin to USB cable can only be plugged into your iPad one way. If the iPad is facing you, the 30 Pin to USB cable should have a little oval with a line in the center of it facing you. If you try jamming the 30 Pin to USB cable upside down, you can cause damage to the cable or your iPad.

Lightning Connector can be found on the iPad 4, iPad Air and iPad mini. The Lightning to USB cable can be plugged into your iPad either way.
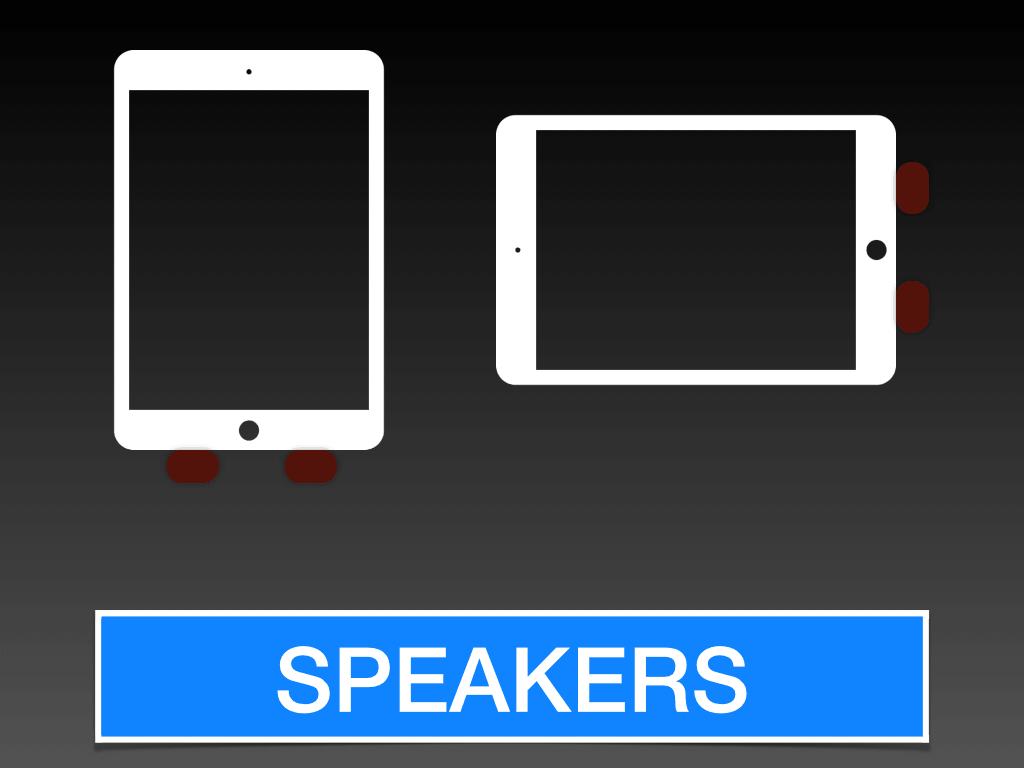
The speaker can be found on the bottom left corner on the back of the iPad 2, iPad 3, and iPad 4. The speaker can be found on the bottom near the 30 pin connector or Lightning connector on the Original iPad and the iPad mini.

The iSight Camera allows you to take photos and record video. I wouldn't recommend using the iPad camera as your primary camera on a nice vacation or at a special event (wedding, graduation, baptism) as the picture quality is subpar. Videos turn out pretty nice though!
“When taking pictures with the iSight camera make sure that your home button is on the right side of the screen or the bottom of the screen.”

While listening to audio (music, podcasts, audiobooks, videos, etc.) you can adjust the volume using the Volume Up/Down switch on the side of your iPad. If you are expecting a FaceTime or Skype call on your iPad, make sure that your volume is turned up so you can hear when the call comes in.

The Side Switch can do two different tasks. It can either be a Mute switch or a Lock Rotation switch.
You can tell that the Side Switch is active if it is flipped in the bottom position and you can see an orange dot.

In this photo the Side Switch is activated because it is in the down position and you can see an orange dot.
I prefer to have my Side Switch be a Lock Rotation switch since I like to lock my iPad in horizontal mode most of the time unless I am reading on it.
iOS is the name of the software that runs your iPad. The current version of iOS is 8.0
To view what version of iOS you have on your iPad you can follow the steps below:
- Tap Settings
- Tap General
- Tap About
The iOS version is listed under Version.
The original iPad can be updated to 5.1.1 and can't be updated to anything newer.

Minor Sections
Click or tap on the section you want to go to and it will take you directly there.


AirPrint Compatible Printers
“It is very important that a printer says it is AirPrint compatible.”
If the printer says it is wireless but does not say AirPrint compatible there is a strong possibility that it will not work. You can find a list of printers that are AirPrint Compatible on Apple's website.
If you can find it I would recommend the Epson WorkForce WF-3520. I have had numerous clients purchase this printer and it is easy to setup, works well, and is reasonably priced. This is the printer I have in my home office and I love it.
If you can't find the Epson WorkForce WF-3520, I would recommend the next generation Epson WorkForce WF-3620. It is slightly faster and has slightly better print quality, but ink is 10-15% more expensive than the WF-3520.

Transferring Photos From Camera
If you would like to put your photos directly on the iPad from your camera you will need to purchase one of the following:
30 Pin Connector (Original iPad, iPad 2, iPad 3) - Apple iPad Camera Connection Kit
Lightning Connector (iPad 4, iPad mini, iPad Air) - Lightning To SD Card Camera Reader
Lightining Connector (iPad 4, iPad mini, iPad Air) - Apple Lightning to USB Camera Adapter
These adapters are very easy to use. You plug them into your iPad, plug in your camera or SD card, and the photo app opens up, you tap Import on the bottom row, and you either tap on the individual photos that you want or tap Import All.

Bluetooth Keyboards
If you want to do a lot of typing on your iPad you may want to consider a Bluetooth Keyboard. It is important that the keyboad says that it is Bluetooth compatible or otherwise it will not work.
Apple sells a keyboard that works with the iPad. You can find it at Apple Stores, Best Buy, or on Apple's website. It retails for approximately $79.
You may also want to check out the Logitech Bluetooth Multi-Device Keyboard K480. It retails for approximately $50 on Logitech's website.

I mentioned in class that some people like to use a stylus instead of their finger to interact with the iPad. If you purchase one of these at a local store (Target, Best Buy, Wal-Mart) you will probably spend between $10-$15.
Based on reviews online I would recommend amPen New Hybrid Stylus. It is currently listed at less than $7.

If you would like to use your iPad while it is charging and not have to sit right next to a power outlet you might want to consider the AmazonBasics USB 2.0 A-Male to A-Female Extension Cable. This will give you an additional 9 feet of cord to work with. It is currently listed at less than $5.

We are big fans of iKlear. Mike purchased the iKlear Cleaning Kit in 2010 and still have some plenty left in the large bottle and haven't even used the small bottle. The iKlear Cleaning Kit includes a micro fiber cloth and some travel wipes.
“It is important to use a product that does not contain alcohol, ammonia, or sodium lauryl sulfate.”
“Always spray your cleaner directly on the cloth and not on the iPad screen.”

“The Lock Screen is the first sceen you see when you wake your iPad up from sleep.”

“We strongly recommend that everyone has a passcode on their iPad in case of theft. You wouldn’t want someone to get access to your email account!”
“Write your iPad passcode in a safe place!”


Minor Sections
Click or tap on the section you want to go to and it will take you directly there.

The Home Screen is the primary way we interact with our iPad. The Home Screen is the place where we access all of our apps and the place where we return to when we are done using an app.
There are four primary elements of the Home Screen:
- Status Bar
- Screen Indicator Lights
- Dock
- App Icons


Ever wonder what the icons at the top of your iPad's screen symbolize? Here is a brief rundown of what you might see in your status bar.
You can move between the various status bar icons by clicking or tapping on the controls on the left and right side of the slideshow.


“The screen indicator lights show you which page of Apps you are currently viewing. This also shows the amount of pages there are on your home screen. ”

The Dock is a place for your favorite or most used apps. You can put up to 6 apps or Folders onto the Dock. The Dock is always found at the bottom of the Home Screen so it makes it easy to access your favorite or most used apps.


If you delete an app, you are deleting the data inside the app as well. For example, if you had an app that contains spreadsheets and you decided to delete the app, you would lose the spreadsheets that were inside that app as well.
If you deleted app, and determine later on that you want to get the app back, simply going to the App Store and download it for free.

Minor Sections
Click or tap on the section you want to go to and it will take you directly there.


Dictation is available on the following devices:
- iPad 3
- iPad 4
- iPad Air
- iPad mini
- iPhone 4S
- iPhone 5
- iPhone 5C
- iPhone 5S
- iPhone 6
- iPhone 6+
- iPod Touch 5th generation
“When using Dictation you need to make sure that you speak clearly and say your punctuation marks.”
To use dication, you need Siri enabled. You can enable Siri in Settings > General > Siri and you have to be connected to the internet.
These are to be spoken when Dictation is active:
- “All Caps” to capitalize all of only the next word (e.g. START)
- “Caps” to capitalize the next word (e.g. Start)
- “Upper Case [letter]“ for making a spelling out acronyms (e.g. SAT)
- “Caps On” to turn on caps lock
- “Caps Off” to turn off caps lock
- “No Caps” to use no capitals with the word
- “Numeral [number]“ to type the number rather than word
- “New Paragraph” to create a new paragraph
- “New Line” to insert and start a new line
- “No Space” to prevent a space from being between the next word
- “No Space On” to turn off all spaces in the next sequence of words (helpful for passwords)
- “No Space Off” to resume normal spacing between words
Here is how you would say the various puncuation marks:
- question mark ?
- inverted question mark ¿
- exclamation point !
- hyphen -
- dash –
- em dash —
- underscore _
- comma ,
- open parenthesis (
- close parenthesis )
- open square bracket [
- close square bracket ]
- open brace {
- close brace }
- semi colon ;
- ellipsis …
- quote “
- end-quote ”
- back quote “
- single quote ‘
- end single quote ’
- double-quote “
- apostrophe ‘
- colon :
- slash /
- back slash \
- tilde ~
- ampersand &
- percent sign %
- copyright sign ©
- registered sign ®
- section sign §
- dollar sign $
- cent sign ¢
- degree sign º
- caret ^
- at sign @
- Pound sterling sign £
- Yen sign ¥
- Euro sign €
- pound sign #


iCloud does a variety of things. In this class we are going to cover Find My iPad and Backup.

